Wenzhou Prance Hydraulic Equipment Co., Ltd

Hydraulic Motor Shaft Seal Failure: Pressure, Alignment, and Wear
Hydraulic motor shaft seal failure can result from excessive case pressure, shaft runout, damaged sealing surfaces, contamination, unsuitable seal material, heat or installation damage. A new seal will not solve the problem if the housing remains overpressurized or the shaft keeps moving outside the seal's intended conditions. Identify the source of the leak and the exact seal configuration before ordering parts.
This guide explains how to distinguish a seal problem from a broader motor or circuit fault. It helps maintenance teams preserve evidence and helps buyers specify a repair or replacement without inventing a universal case-pressure limit or seal material requirement.
Confirm where the oil is coming from
Oil visible near the shaft can have travelled from a fitting, housing joint or nearby gearbox. Clean the outside using a suitable procedure with the machine isolated, then observe a controlled test from a safe position. Record the first visible wet area and the operating event when leakage begins. Do not touch or search for a pressurized leak with a hand.
Check whether the fluid is hydraulic oil, gearbox lubricant or another source. Color alone may be misleading after contamination or mixed maintenance fluids. Photographs taken before cleaning can help identify the original path. A seal replacement based only on oil at the bottom of a housing can miss an upstream leak and introduce unnecessary dismantling risk.
Measure case pressure at the motor
The shaft seal is exposed to the housing condition, not simply the main system pressure. A motor with acceptable work-port pressure can still have excessive case pressure because of a restrictive drain, wrong connection or pressurized destination. Measure close to the case connection using a rated setup and compare with the exact motor and seal limits.
Capture startup, reversal and simultaneous machine functions. A slow gauge may show a reassuring average while missing a brief pressure excursion. Cold oil, loaded filters, small couplers and shared lines deserve particular attention. Document the instrument location and response so the result can be interpreted rather than treating every pressure reading as equivalent.
Trace the complete drain path
Follow the line from the motor to the approved destination. Check the drain-port designation, hose inside diameter, route length, adapters and any valves or filters. A disconnected or partially engaged quick coupler can leave the housing with an obstructed path. A visible hose does not prove that oil can actually reach the tank.
Confirm whether the housing requires a particular port for the installed orientation. Some motor configurations have internal drain arrangements that differ from externally drained variants. Use the full code and schematic rather than assuming that all motors in one family are connected alike. After any hose modification, repeat the case-pressure verification under the demanding operating conditions.
Inspect shaft condition and movement
A grooved, corroded or scratched sealing surface can damage the contact lip or create a leakage path. Record surface condition and dimensions against the repair instructions. A fingernail observation may locate a defect, but it does not establish a repair limit. The permitted shaft finish, diameter and repair method must come from the controlled component documentation.
Check shaft runout, bearing play and coupling alignment using an appropriate measurement method. Excessive radial movement can make a seal lose consistent contact even if the seal itself was installed correctly. Inspect external shaft loads and the mounting arrangement. A belt overtensioned during maintenance can contribute to bearing and seal trouble without changing the motor's hydraulic specification.
Match seal material to the actual service
Seal suitability depends on the fluid, temperature, speed and pressure environment. Different elastomers have different compatibility and operating boundaries. Do not choose a material based solely on color or an informal statement that it is a higher-temperature upgrade. The lip design, spring, housing fit and pressure capability are part of the specification too.
Send the supplier the exact oil designation and any additives, cleaning fluids or environmental exposure that contact the seal. If the machine uses a fire-resistant or biodegradable fluid, obtain written compatibility confirmation for the complete motor configuration. A replacement seal should be selected using the approved part specification, not an assumed cross-reference from a visually similar component.
Separate thermal damage from hydraulic restriction
An overheated seal can be a symptom of several conditions: excessive speed, inadequate lubrication, friction caused by shaft misalignment or heat generated elsewhere in the circuit. Record oil temperature and motor housing temperature at identified locations. A hot housing does not prove that the seal lip generated the heat.
Compare temperature with load, case pressure and leakage. If high pressure loss in the drain or return coincides with heating, investigate that path. If the problem appeared after coupling work, examine mechanical alignment. Preserve the operating sequence; the seal may have failed after a temperature problem rather than creating it.
Use an evidence-based inspection table
| Finding | Condition to investigate | Next useful check |
|---|---|---|
| Leak mainly during cold start | High viscosity or restricted drain path | Record startup case-pressure peak and drain resistance |
| Leak after reversal | Pressure excursion, shaft movement or brake interaction | Capture both work pressures, case pressure and the command |
| Lip or shaft contact damage | Surface defects, runout or installation error | Inspect the shaft and measure movement using approved limits |
| Repeated short seal life | Uncorrected circuit or alignment condition | Compare each repair with the unchanged machine arrangement |
| Heat-related deterioration | Oil temperature, speed, friction or fluid compatibility | Review the actual duty and material specification |
| Oil appears above the shaft | Fitting or housing-joint leakage | Establish the first wet location before dismantling |
These observations guide testing. Several causes can coexist, and the table should not be used as a substitute for the selected motor's service instructions.
Protect the replacement during installation
Isolate energy, support loads, release stored pressure and prevent contamination before disassembly. Follow the specified procedure for removing the old seal without damaging the shaft or housing. Inspect the seal seat and the components that support the shaft. Retain the failed seal until the cause has been reviewed.
Use the correct installation tool and orientation. Shaft splines, keys and sharp edges can cut a new lip as it passes over them; use the approved protection method. Lubrication, insertion depth and spring orientation are design-specific. Do not publish or apply a generic installation depth to an unidentified seal arrangement.
Avoid improvised repairs that hide the cause
Moving a seal to a different shaft location, adding an unapproved sleeve or installing a seal advertised as higher pressure can alter the fit and lubrication arrangement. Such repairs need manufacturer or qualified repair approval. A stronger seal does not authorize running the motor case above its approved limit.
Likewise, adding sealant around an incorrectly seated seal is not an acceptable correction for a damaged bore or wrong part. Identify what was measured and which repair standard applies. If the shaft, bearing or housing is outside service limits, the scope of repair may need to extend beyond the seal.
Commission the repaired assembly through realistic events
After assembly, restore the required oil fill and verify drain continuity before starting. Begin with the approved commissioning sequence and inspect for external leakage without approaching moving parts. Record case pressure and temperature at reduced duty, then increase toward the normal load within the component limits.
Repeat cold-start, warm-duty and reversal checks where the application uses them. Include simultaneous functions that could pressurize a shared destination. An unloaded warm test alone cannot validate a cold-start seal issue. Define the agreed acceptable external-leakage condition and retain the observation period and test conditions with the repair report.
Decide when a replacement motor is the better route
Repeated seal repair may be inappropriate when bearing damage, shaft wear or housing damage makes the assembly uneconomic or unreliable. Obtain a complete inspection finding before comparing repair and replacement costs. The replacement must still match the corrected circuit and mechanical interface; buying the same motor without changing the cause can reproduce the failure.
Ask whether the proposed configuration has the correct seal, shaft, drain and mounting options for the duty. Request controlled drawings and limits. Do not interpret an advertised equivalent model as proof of fluid compatibility, shaft finish or case-pressure capability. Those details belong in the purchasing record.
RFQ information for seal failure review
Provide the full model code, original seal part number where available, fluid designation and temperature range. Add the operating speed, direction, shaft-load arrangement and drain routing. Include when the leak occurs and measurements taken at the housing rather than only the main pressure gauge.
Send photographs of the leak origin, removed seal, shaft contact surface and housing seat. State any recent bearing, coupling or hose changes. Request a diagnosis that distinguishes confirmed damage from proposed causes and identifies the checks required before restarting. A quotation for a seal alone is not a root-cause report.
Frequently asked questions
Does a shaft-seal leak mean the motor is worn out?
Not always. An incorrect drain connection or pressure excursion can cause leakage in an otherwise serviceable motor. Inspect the circuit and the shaft before deciding on complete replacement.
Can a high-pressure seal fix excessive case pressure?
Only an explicitly approved configuration can change an allowable condition. Installing a different seal does not override the motor's housing, bearing or drainage requirements.
Why does leakage happen only when the oil is cold?
Cold oil can increase resistance in the drain path and other restrictions. Measure case pressure during the event and compare it with the exact model's limits rather than assuming the seal is defective.
Should shaft runout be checked after a seal replacement?
If shaft movement, bearing wear or alignment is suspected, check it using the approved method and limits. A damaged sealing surface or unstable shaft can shorten the new seal's life.
What proves that the repair worked?
A repeatable test through the conditions that caused the original leak, with acceptable case pressure, temperature and external leakage. Retain the test setup and readings so the result can be reviewed.
Product and related engineering resources
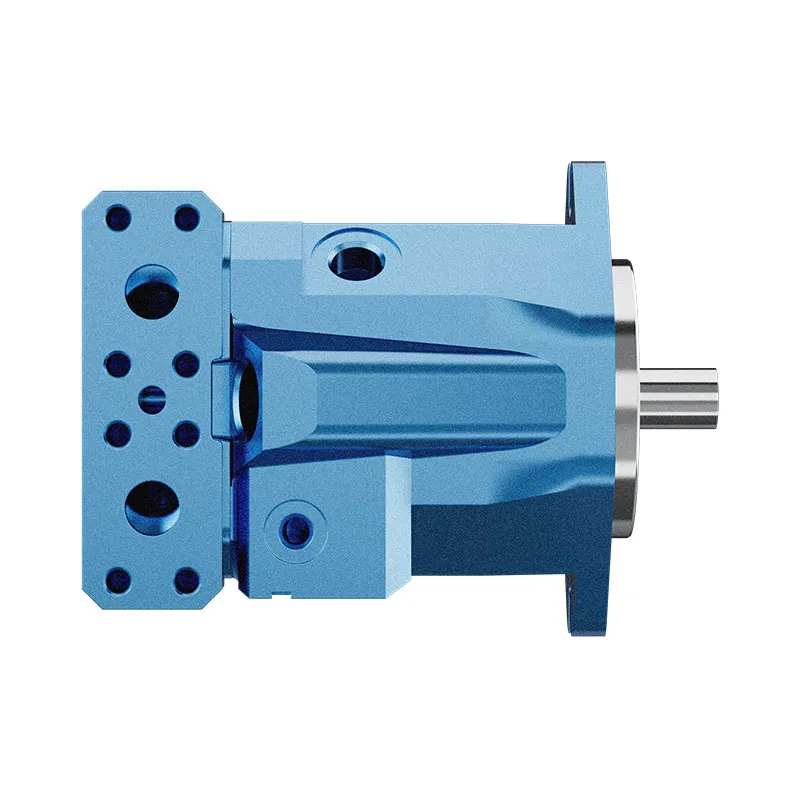
For a component enquiry, review Variable Displacement Piston Motor A10VM and provide the full specification and installation conditions. Related guides: piston motor range, orbital motor range, motor case-pressure checks, motor drain-flow measurement, motor efficiency calculation, Hydraulic Motor Case Drain Line Sizing and Connection Rules, Hydraulic Motor Bearing Failure: Symptoms and Root Causes. Product photographs illustrate catalog configurations; they do not establish a pressure, speed or shaft-load rating for an unconfirmed order.
University lecture: hydraulic motor fundamentals
NPTEL-NOC IITM presents a hydraulic-motor lesson from IIT Madras. The lecture supports the distinction between hydraulic input and shaft output used in this guide. Component-specific installation and operating limits still require the selected motor documentation.
Open the NPTEL hydraulic motors lecture.
Technical and safety references
- NPTEL: Fundamentals of Industrial Oil Hydraulics and Pneumatics
- NIOSH: preventing injuries from hazardous energy
- Technical reference: orbital-motor operating principles and installation
These references provide educational and technical context. A reference manufacturer model-specific ratings are not specifications for a Prance product and do not imply brand affiliation or authorization.